Litchfield Farmers' Market
  • Visit the Market
    • Schedule and Directions
    • Market Vendors
  • Apply to the Market
  • About
    • Reviews
    • Contact Us
  • Recipes & Blogs
    • Recipes
    • Through the Kitchen Window
    • A Practical Cat's Book of Household Clues
  • Visit the Market
    • Schedule and Directions
    • Market Vendors
  • Apply to the Market
  • About
    • Reviews
    • Contact Us
  • Recipes & Blogs
    • Recipes
    • Through the Kitchen Window
    • A Practical Cat's Book of Household Clues

Easy Blender Cheese Souffle

2/18/2026

0 Comments

 
Ingredients
1 tablespoon butter
6 eggs
½ cup heavy cream (or ½ and ½)
1/4 cup grated Parmesan cheese 
1/2 teaspoon prepared mustard
½ teaspoon salt
¼ teaspoon pepper
½ lb. sharp cheddar cheese (see substitutes note below)
​11 ounces cream cheese (or reduced calorie Neufchatel)

Preparation
  1. Preheat oven to 375 degrees.
  2. Butter a 5-cup soufflé dish or casserole or 5-6 individual baking dishes.
  3. Place eggs, cream, Parmesan, mustard, salt and pepper in container of electric blender. Whirl until smooth.
  4. Cut Cheddar cheese into pieces and add piece by piece, to mixture in container while motor is running.
  5. Cut cream cheese into cubes and add to container while motor is running.
  6. Pour mixture into soufflé dish.
  7. Bake in a moderate oven (375 degrees) for 45 minutes for a soft, liquidy center. 50 minutes for a firm soufflé.
  8. Bake individual soufflés for 15 to 20 minutes.
  9. Serve immediately

MAKE AHEAD NOTE: Soufflé can be prepared and poured into soufflé dish then covered and held for 1-2 hours at room temperature. If holding longer, or if kitchen is hot, refrigerate, then allow an extra 5 to 10 minutes to baking time.

SUBSTITUTES: For the 1/2 pound of cheddar cheese you can substitute almost any semi-moist ingredient:  another cheese, cubed ham, combination of cheese and ham, froxen spinach thawed and squeezed dry, cooked carrots, chopped up chocolate, chopped up pears.  For some you might want to eliminate the mustard, salt and pepper.  This is a very forgiving recipe.  The worst result with substitutes is it won't rise as high.  But it will still taste absolutely yummy. 
0 Comments

Bunny Deviled Eggs

4/13/2022

0 Comments

 
INGREDIENTS

  • 1 doz. hard-cooked eggs
  • 4 oz. softened cream cheese
  • ½ cup mayonnaise
  • 1 Tbsp. yellow mustard
  • 1/8 tsp. onion powder
  • 4 large radishes
  • 3 pitted black olives, each cut into 16 small pieces
  • 12 fresh chives, cut into 1-inch lengths

PREPARATION
1. Cut eggs lengthwise in half. Remove yolks; place in medium bowl. Add cream cheese, mayo, mustard and onion powder; beat with mixer until blended.
2. Spoon yolk mixture into egg whites.
3. Cut both ends off each radish; cut into 24 small pieces for the bunnies' noses. Cut each of the trimmed radishes into 6 lengthwise slices, then cut each slice crosswise in half for the bunnies' ears. 
​
4. Decorate eggs with radishes, olives and chives as shown in photo.


0 Comments

Easy Blender Cheese Souffle

1/6/2021

0 Comments

 
Ingredients
1 tablespoon butter
6 eggs
½ cup heavy cream (or ½ and ½)
1/4 cup grated
Parmesan cheese
1/2 teaspoon prepared mustard
½ teaspoon salt
¼ teaspoon pepper
½ lb. sharp cheddar cheese or other cheese of your choice)
​11 ounces
cream cheese (or reduced calorie Neufchatel)

Instructions
  1. Preheat oven to 375 degrees.
  2. Butter a 5-cup soufflé dish or casserole or 5-6 individual baking dishes.
  3. Place eggs, cream, Parmesan, mustard, salt and pepper in container of electric blender. Whirl until smooth.
  4. Cut Cheddar cheese into pieces and add piece by piece, to mixture in container while motor is running.
  5. Cut cream cheese into cubes and add to container while motor is running.
  6. Pour mixture into soufflé dish.
  7. Bake in a moderate oven (375 degrees) for 45 minutes for a soft, liquidy center. 50 minutes for a firm soufflé.
  8. Bake individual soufflés for 15 to 20 minutes.
  9. Serve immediately

MAKE AHEAD NOTE: Soufflé can be prepared and poured into soufflé dish then covered and held for 1-2 hours at room temperature. If holding longer, or if kitchen is hot, refrigerate, then allow an extra 5 to 10 minutes to baking time.

SUBSTITUTES: You can substitute spinach for cheese, or do half and half. Or add some cubed ham to cheese. The recipe is very forgiving in terms of amounts. As long as you have the basic eggs, half and half, and cream cheese it will set up.  
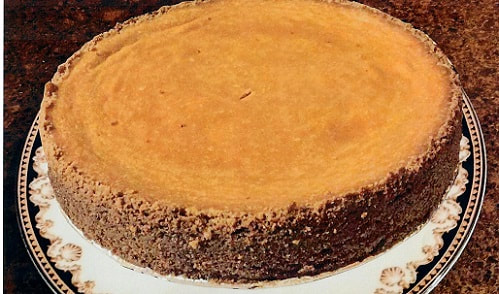
0 Comments

Gluten-free Pumpkin Cheesecake with Gingersnap Crust

11/20/2019

0 Comments

 
Picture
Serves 8
​
Crust:
2 ½ to 3 cups gluten-free gingersnap cookies crumbled medium finely
3 tablespoons brown sugar
6- 8 tablespoons melted unsalted butter
Pinch of salt


Cheesecake:
1 tablespoon softened unsalted butter
24 oz cream cheese, softened
1 cup brown sugar
1 ½ cups pumpkin puree
½ cup heavy cream

⅓ cup maple syrup
1 tablespoon vanilla extract
¼ teaspoon ground cloves
½ teaspoon ground allspice
¾ teaspoon ground cinnamon
4 large eggs


  1. Preheat oven to 350°.
  2. ​Butter a 9-inch springform cakepan and set aside.
  3. Use a fork to combine the gingersnap crumbles, 3 tablespoons of brown sugar and the melted butter, taking care to add only sufficient butter to bind the other ingredients.
  4. ​Press the crust mixture into the bottom and up about 2 inches of the sides of the buttered pan.
  5. Add the cream cheese and brown sugar to a large bowl and beat with an electric beater until the mixture is light and fluffy.
  6. ​Add the pumpkin, stirring to blend well.
  7. Add the heavy cream, maple syrup, cinnamon, allspice and vanilla. Stir to blend well.
  8. ​Add one egg at a time and using an electric beater on a slow speed, beat each egg into the mixture thoroughly.
  9. Pour the batter into the prepared springform pan. Bake in in the preheated oven for 55 to 85 minutes or until the center is set.
  10. Set on a rack to cool for 30 minutes. Then refrigerate overnight.
0 Comments

July 10th, 2019

7/10/2019

0 Comments

 
0 Comments

MAPLE-WALNUT CHEESECAKE                  as adapted from Matt and Ted Lee

10/18/2017

0 Comments

 
Picture
​Makes 1 – 9 inch cake
 
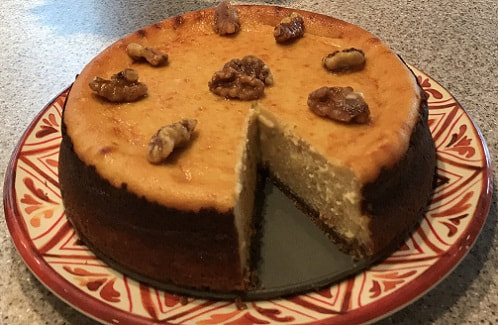
¾ cup graham-cracker crumbs, fine (about 8 double crackers)
1 cup plus 6 tablespoons sugar, divided
1 tablespoon unsalted butter, softened
3 tablespoons unsalted butter, melted
2½ pounds cream cheese, room temperature
3 tablespoons cake flour
¾ cup grade A medium amber maple syrup, divided
4 eggs
2 egg yolks
¼ cup heavy cream
1 teaspoon cornstarch
4 ounces walnut halves (about 1 cup)
 
  1. Preheat oven to 350º.
  2. In a bowl, mix the graham-cracker crumbs with 2 tablespoons of the sugar and blend with a fork.
  3. Grease the sides of a 9-inch spring-form pan and sprinkle it with the cracker mixture, shaking any excess back into the bowl.
  4. Add the softened/melted butter to the bowl and toss with a fork until the butter has moistened the crumb mixture.
  5. Scatter the crumbs evenly over the pan bottom and press into it using the bottom of a straight-sided glass.
  6. Bake for 10 minutes, remove from the oven and let cool.
  7. Raise the heat in the oven to 500º.
  8. With an electric mixer, beat the cream cheese until it is soft and fluffy, about 2 minutes.
  9. Mix the flour with the remaining sugar and add it and ½ cup of the maple syrup to the cheese in thirds, mixing after each addition.
  10. Add the eggs and the yolks to the batter one by one, beating after each addition.
  11. Add the heavy cream and beat again.
  12. Pour the batter into the crust and bake for 15 minutes.
  13. Lower the oven to 200º and bake for an hour more.
  14. Turn off the oven, leave the door halfway open and let the cheesecake cool in the oven for a half-hour.
  15. Chill in the refrigerator for at least 4 hours and not more than 24.
  16. When ready to serve, heat the remaining ¼ cup of maple syrup over low heat in a small saucepan until it bubbles and let simmer gently for 1 minute, until it has thickened slightly.
  17. Whisk in the cornstarch and turn off the flame.
  18. Add the walnuts to the maple mixture and turn to coat.
  19. Using tongs, spread the walnuts out on a piece of parchment paper to cool and harden into praline.
  20. Sprinkle some walnuts on top of the cheesecake.  Serve the remaining candied walnuts with each slice.
 
 
0 Comments

Trick Snow Peas

6/28/2017

0 Comments

 
Picture
Serves 6 to 8
 
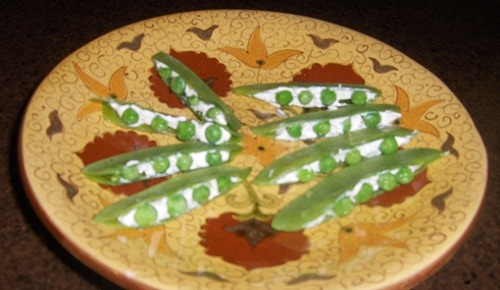
1 lb. fresh snow peas
8 oz. whipped cream cheese
¼ teaspoon freshly ground black pepper
½ cup frozen green peas (keep in a bowl in the freezer until needed)
 
  1. Line a cookie sheet with plastic wrap.
  2. Rinse the snow peas with cold water and drain on a paper towel.
  3. Pull off the “string” of each pod on the inside of its curve with a paring knife.
  4. Make a slit in the pod where the string was, slightly opening the pod.
  5. In a small bowl, mix the cream cheese and the pepper well.
  6. If you have a pastry decorating bag, great.  If not, use a small plastic bag and, once filled, cut a small hole in one corner.
  7. Fill the bag with the cream cheese mixture.  Squeeze a little of the mixture into each slit pod and place it on the cookie sheet.
  8. When you have as many as you want, remove your peas from the freezer.
  9. Place 3 or 4 peas into the mouth of the pods, sticking them into the cream cheese mixture.
  10. Cover the cookie sheet with plastic and place into the refrigerator until ready to serve.  They can stay fresh for up to 4 days.
0 Comments

    Archives

    March 2026
    February 2026
    January 2026
    December 2025
    November 2025
    October 2025
    September 2025
    August 2025
    July 2025
    June 2025
    May 2025
    April 2025
    March 2025
    February 2025
    January 2025
    December 2024
    November 2024
    October 2024
    September 2024
    August 2024
    July 2024
    June 2024
    May 2024
    April 2024
    March 2024
    February 2024
    January 2024
    December 2023
    November 2023
    October 2023
    September 2023
    August 2023
    July 2023
    June 2023
    May 2023
    April 2023
    March 2023
    February 2023
    January 2023
    December 2022
    November 2022
    October 2022
    September 2022
    August 2022
    July 2022
    June 2022
    May 2022
    April 2022
    March 2022
    February 2022
    January 2022
    December 2021
    November 2021
    October 2021
    September 2021
    August 2021
    July 2021
    June 2021
    May 2021
    April 2021
    March 2021
    February 2021
    January 2021
    December 2020
    November 2020
    October 2020
    September 2020
    August 2020
    July 2020
    June 2020
    March 2020
    February 2020
    January 2020
    December 2019
    November 2019
    October 2019
    September 2019
    August 2019
    July 2019
    June 2019
    May 2019
    April 2019
    March 2019
    February 2019
    January 2019
    December 2018
    November 2018
    October 2018
    September 2018
    August 2018
    July 2018
    June 2018
    May 2018
    April 2018
    March 2018
    February 2018
    January 2018
    December 2017
    November 2017
    October 2017
    September 2017
    August 2017
    July 2017
    June 2017
    May 2017
    April 2017
    March 2017
    February 2017
    January 2017
    December 2016
    November 2016
    October 2016
    September 2016
    August 2016
    July 2016
    June 2016
    May 2016
    April 2016
    March 2016
    December 2015
    October 2015
    September 2015
    August 2015

Home

Weekly Update

Vendors

Directions

Contact Us

Copyright © 2026
  • Visit the Market
    • Schedule and Directions
    • Market Vendors
  • Apply to the Market
  • About
    • Reviews
    • Contact Us
  • Recipes & Blogs
    • Recipes
    • Through the Kitchen Window
    • A Practical Cat's Book of Household Clues